Text to Columns
Text to Columns is a great tool that you can use to split up a column of data in several columns. Let’s imagine that you've inherited some data which has been kept in a word document. Don’t laugh, this happens! You copy and paste it into a spreadsheet, but it all goes into a single column rather than being split up.

In the above screenshot we have two possible examples of data which might need to be split across several columns. The first example is a simple list of names, which it’s often useful to have split into ‘First name’ and ‘Surname’ columns. The second set of data is an example of ‘Comma Separated Values’ (.csv), which is a format that is often used when data is extracted from a Microsoft Access database.
Click here for more information about Comma Separated Values
At this point we can start the process of splitting up the data. First you’ll need to select the data you want to split and open the Text to Columns tool. In later versions of Excel you can find this in the ‘Data’ tab, and in older versions you’ll need to select the 'Data' menu and click on 'Text to Columns'. Regardless of the version you’re using the rest of the process is identical.
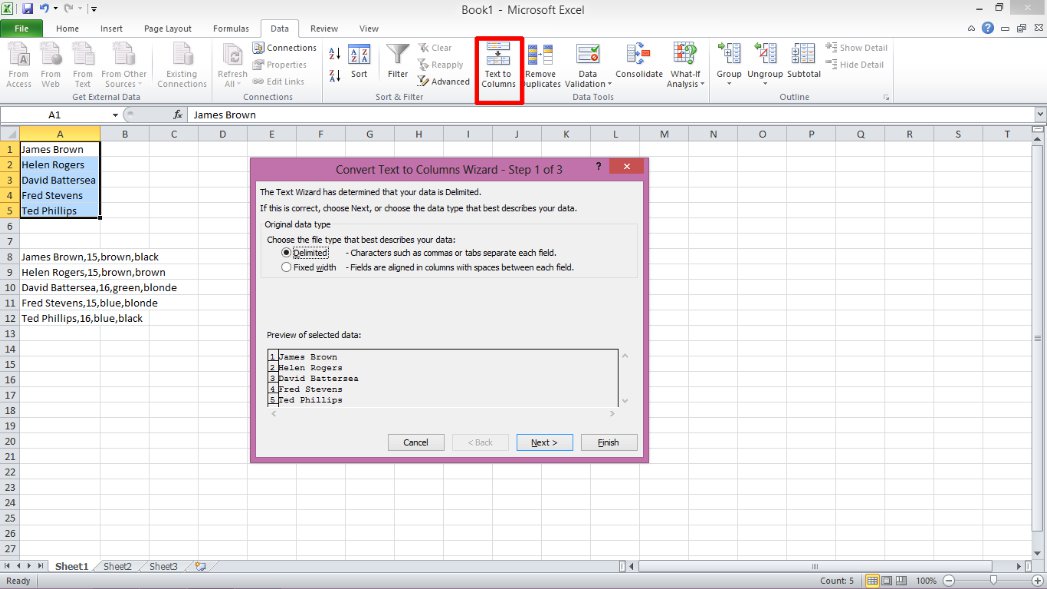
In the menu you’re faced with the ‘Delimited’ option should already be highlighted. You can go ahead and click Next, because you’re never going to want to choose the ‘Fixed Width’ option!
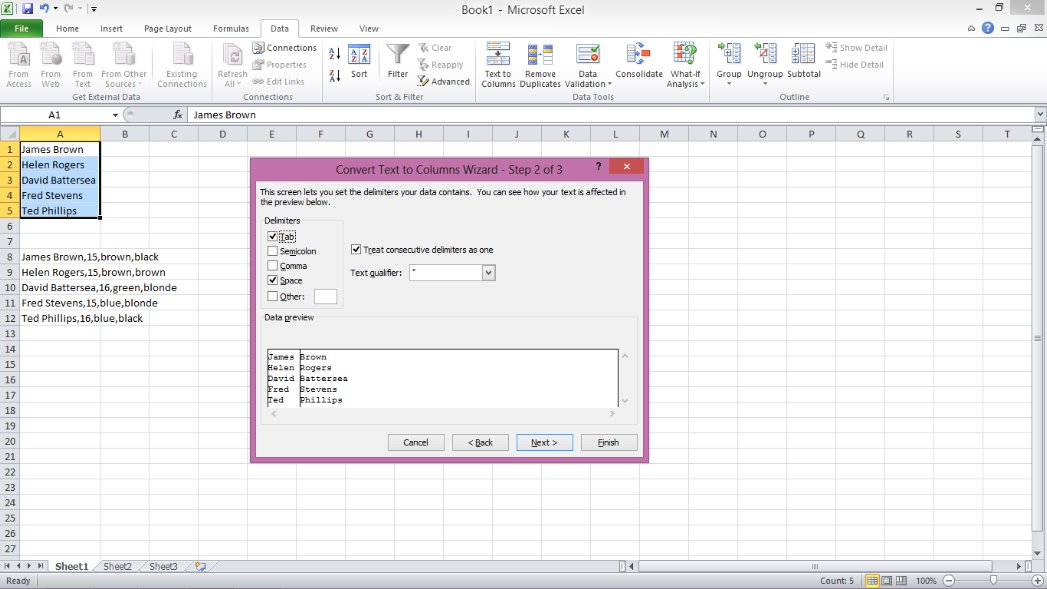
As you can see from the screen above you’re presented with several options to choose from. The main thing on this screen is to select the ‘Delimiter’ you want to use, i.e. the character within each cell that you want to use as a break point when splitting the data. In this example I’ve chosen to split my column of data using a space as the delimiter, which is going to result in two columns – First name and surname. The ‘Data preview’ section of this menu is useful as it adds vertical lines to the preview of your data to demonstrate where the data will be split.
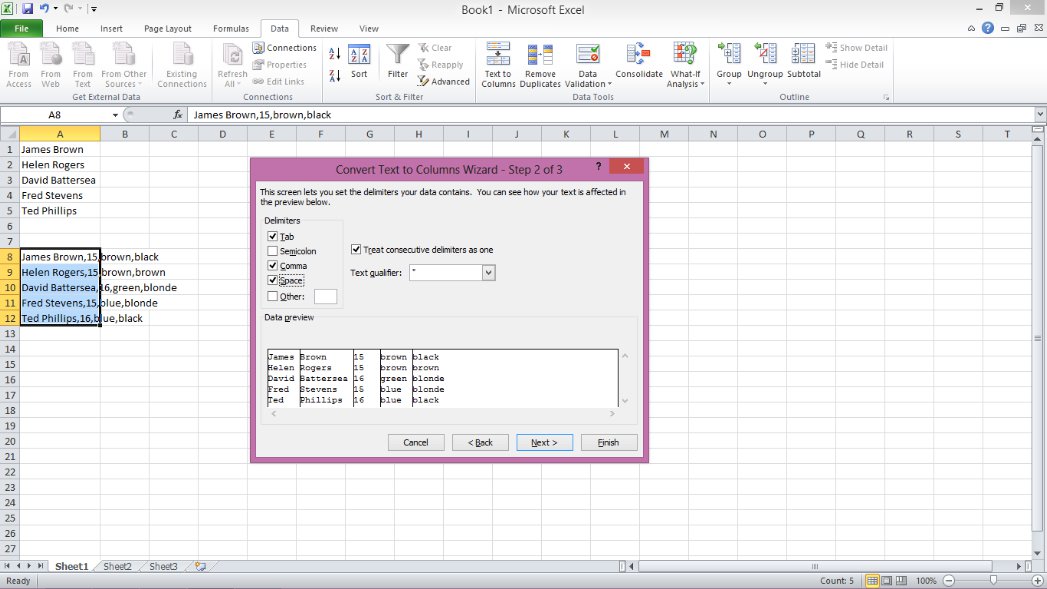
Moving on to our second example you’ll see that I’ve selected both ‘Comma’ and ‘Space’ as delimiters, which will cause the data to First name, Surname, Age, Eye colour and hair colour. You could use any character you like as a delimiter by selecting ‘Other’ and typing that character into the available box.
There are a couple of other options here worth exploring – Firstly ‘Treat consecutive delimiters as one’. You probably won’t need to use this very often, but it can be very helpful. Essentially if you select this option Excel will ignore instances where it finds several delimiters in a row, for example if you were using ‘Space’ as your delimiter but the original owner of the data had accidently entered two spaces between someone’s first name and surname this would be treated as though it were really only one space. Be careful when using this with .csv files – If you find 2 commas in a row it usually means that there was a blank field in that record. For example:
James Brown,15,brown,black
Helen Rogers,15,,brown
In this case the second record is missing the person’s eye colour. If we were to select the ‘Treat consecutive delimiters as one’ option Excel will assume that the consecutive commas in the second record are a mistake and we’ll end up with only 3 columns of data from the second record, rather than 4 columns with one left blank.
The other option that you may sometimes find useful is the ‘Text qualifier’. Sometimes when you’re working with data that has been extracted from a database you’ll find that any text entries have been enclosed in inverted commas. If you select the “” option in the ‘Text qualifier’ drop-down list these inverted commas will be removed when your data is split.
Once you’ve selected the options you want to use you can go ahead and hit the ‘Finish’ button to complete the Text to Columns process. In our case the results look like this:

So that’s all for this Text to Columns Tutorial, I hope you’ve found it helpful. Please let me know your thoughts by completing the feedback form at the bottom of the page.
Looking for more? Return to Excel Tutorials or the Office Software homepage


